Table of Contents
- 1. Create a Business Portfolio and Meta Developer App
- 2. Create a Meta Developer App
- 3. Verify Your Facebook Business Portfolio
- 4. Add WhatsApp Product
- 5. Set Up WhatsApp Business Profile
- 6. Configure API & Payment
- 7. Configure Webhooks (Receive Messages)
- 8. Publish App Live & Add Policies
- 9. Create System User & Generate Token
- 10. Connect in waatee & Register Phone
Optimize your customer engagement by integrating WhatsApp Business Cloud API with waatee. This step-by-step guide covers everything from Facebook Business Verification to connecting your WhatsApp Business account in waatee.
1. Create a Business Portfolio and Meta Developer App #
Create a Meta Business Portfolio
- Log in to Facebook → open business.facebook.com.
- In the left sidebar, click the portfolio dropdown ▾ (shows your name).
- Hit Create a Business Portfolio at the bottom.
- Enter Portfolio name (use your legal/trade name).
- Add a business email you monitor → Next.
- (Optional) Invite teammates or skip for later.
- Review details → Create.
2. Create a Meta Developer App #
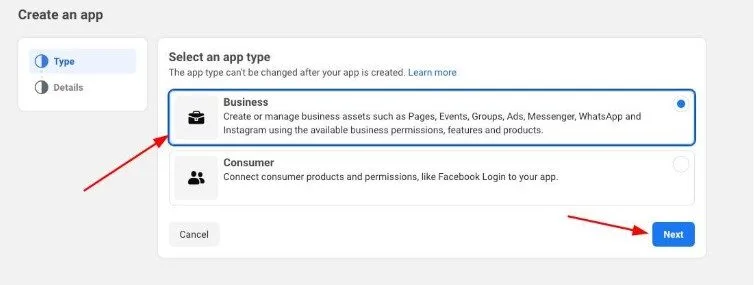
- Go to developers.facebook.com, then navigate to “My Apps” or “Create App” and click Create App

- Select Other use case, then Business app type.
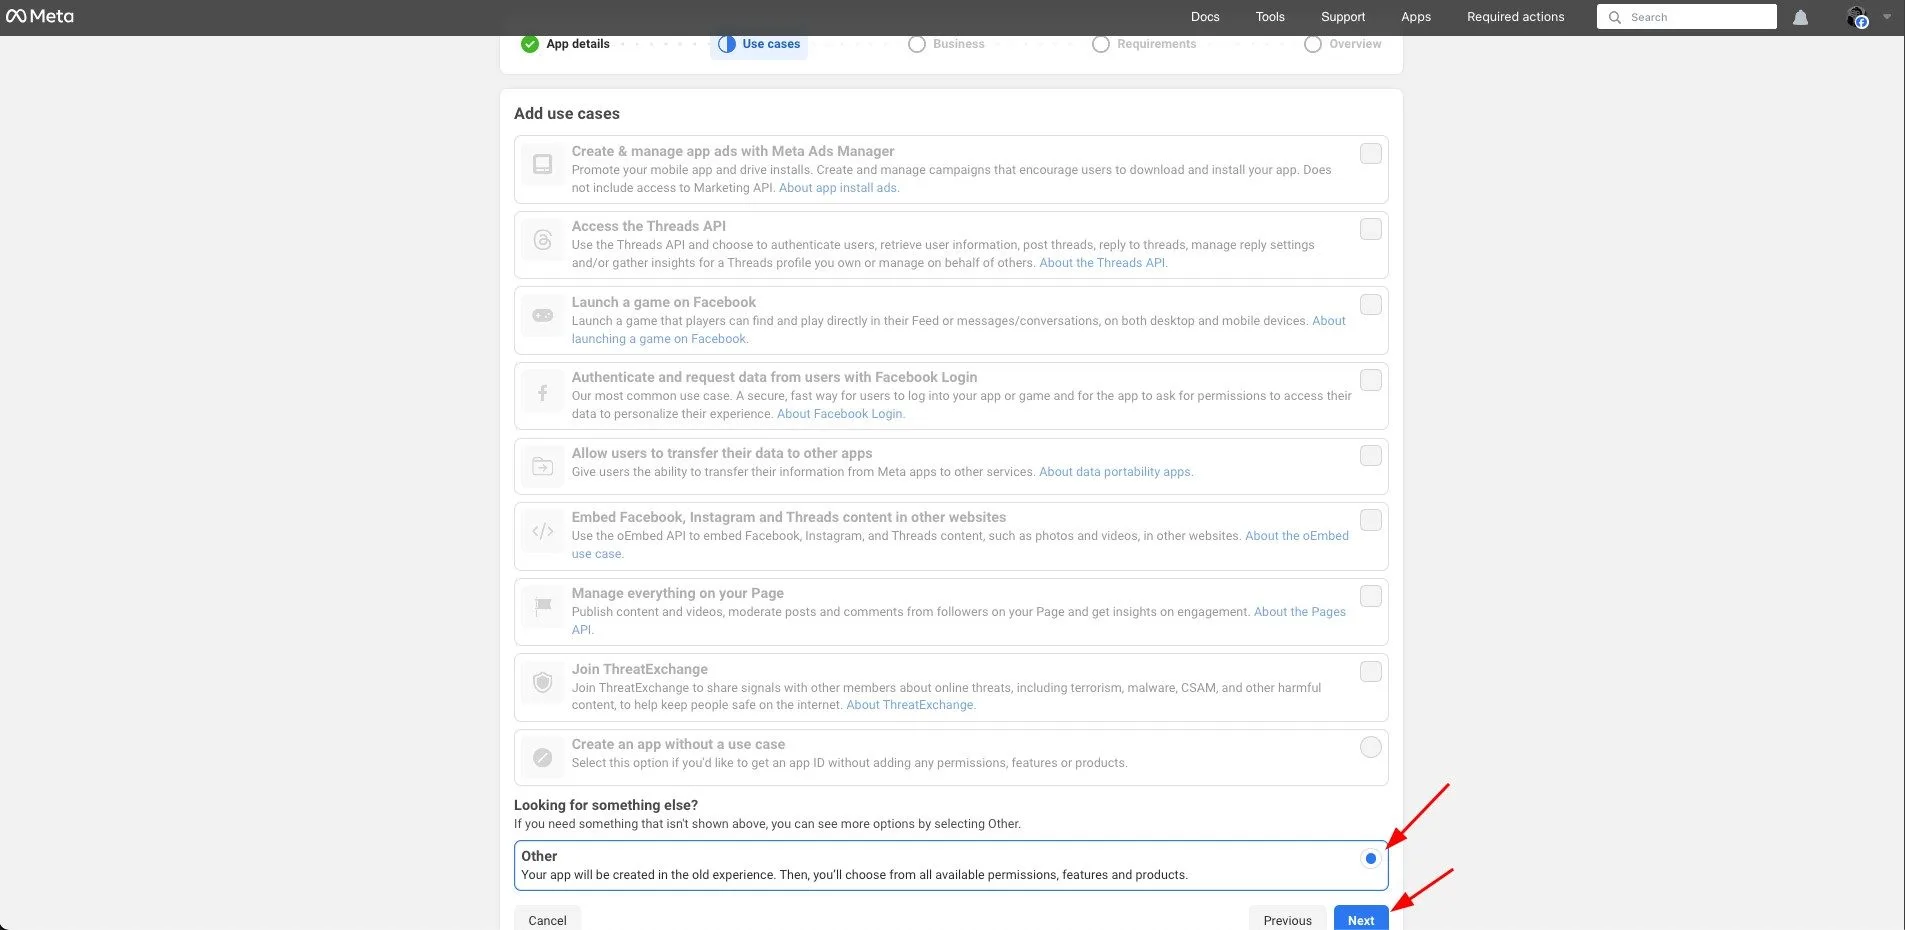
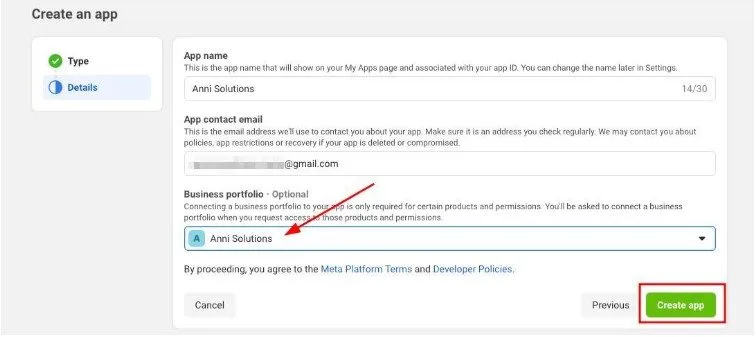
- Enter App Name, Contact Email, and connect your business portfolio, then click Create app
3. Verify Your Facebook Business Portfolio #
Before using WhatsApp Cloud API, ensure your Facebook Business Portfolio is verified:
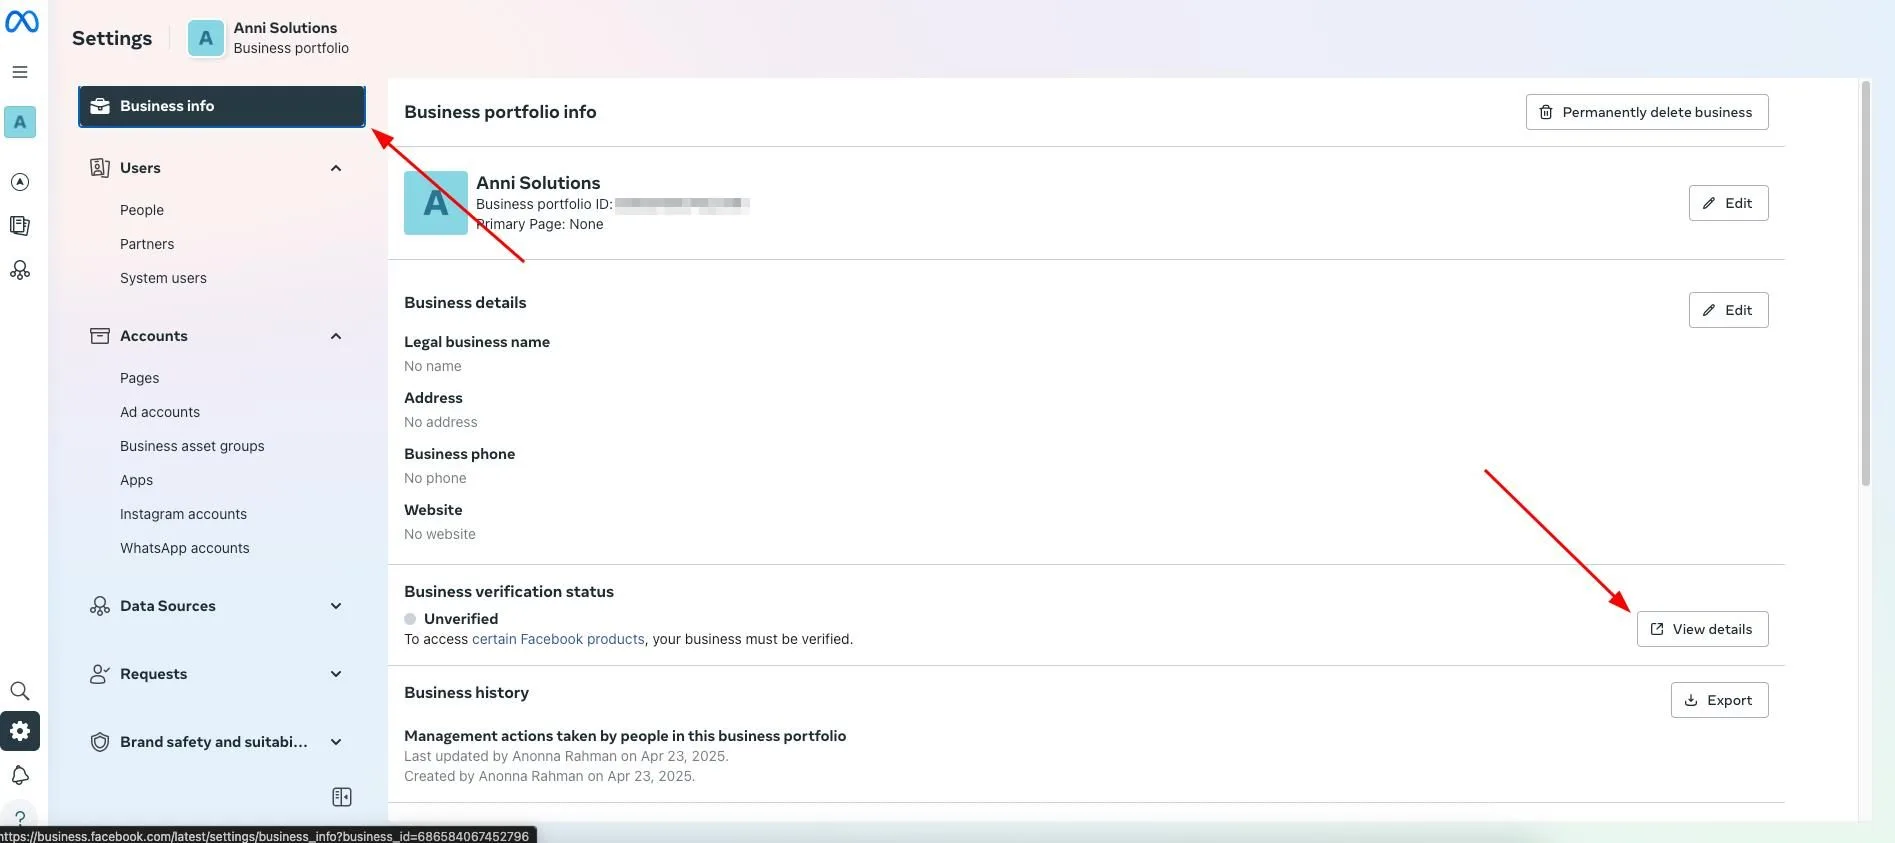
- Open Business Settings in Meta Business Suite.
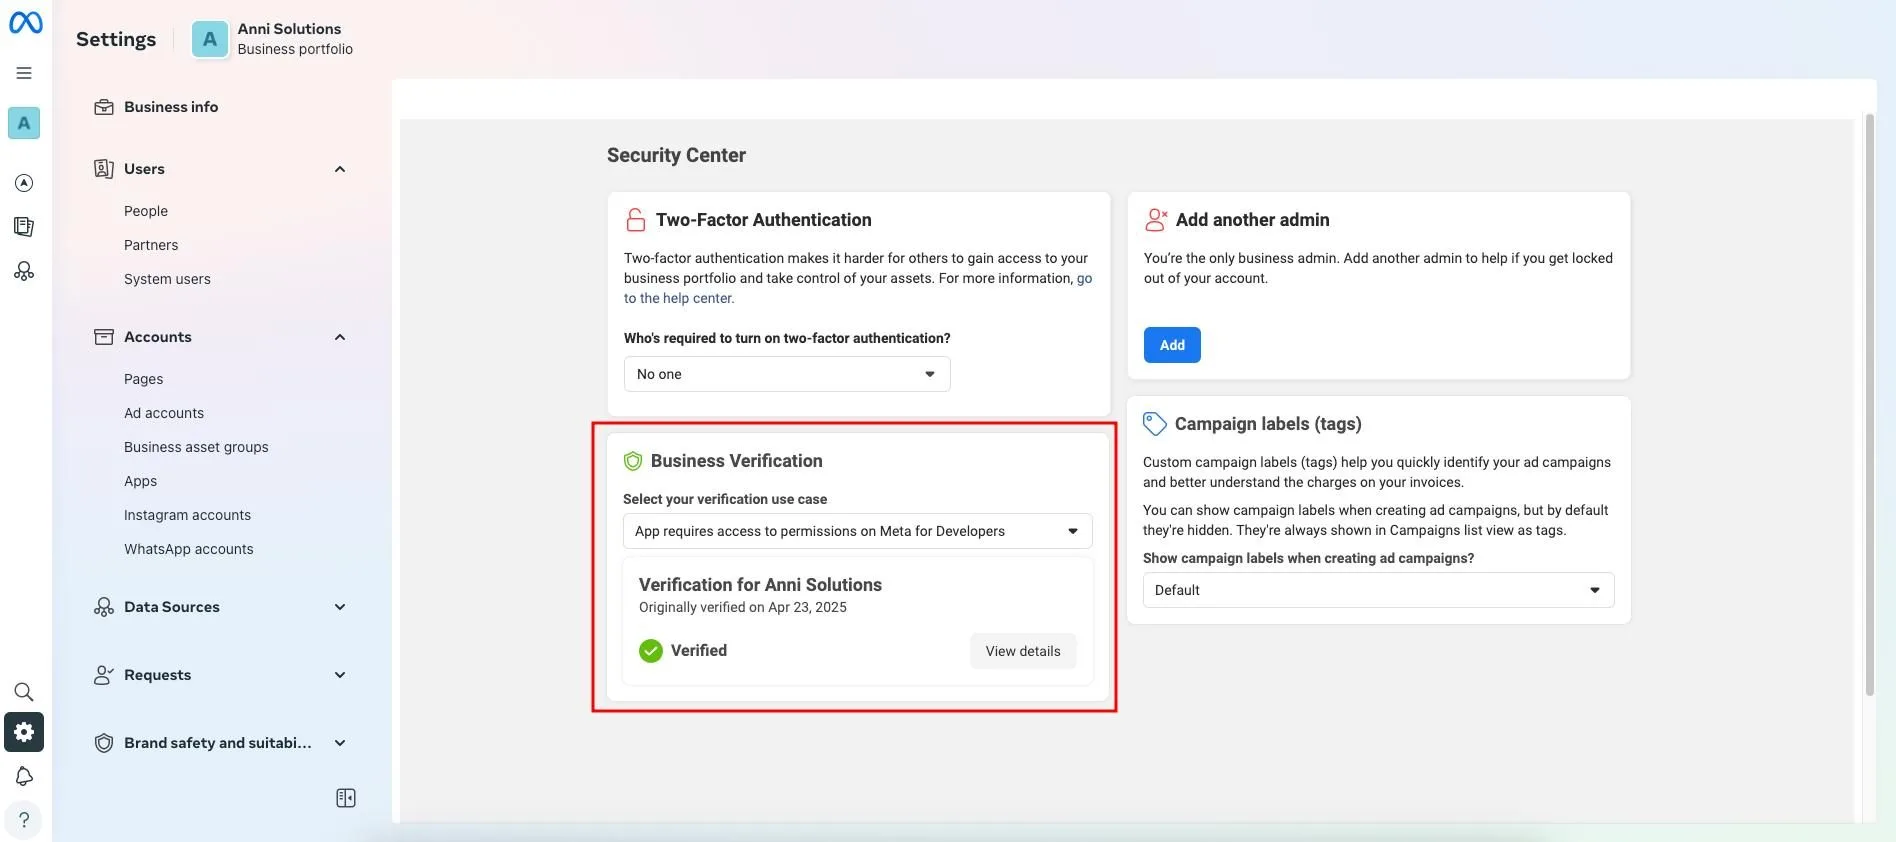
- Navigate to Business Info and click View details under the Business verification status section.
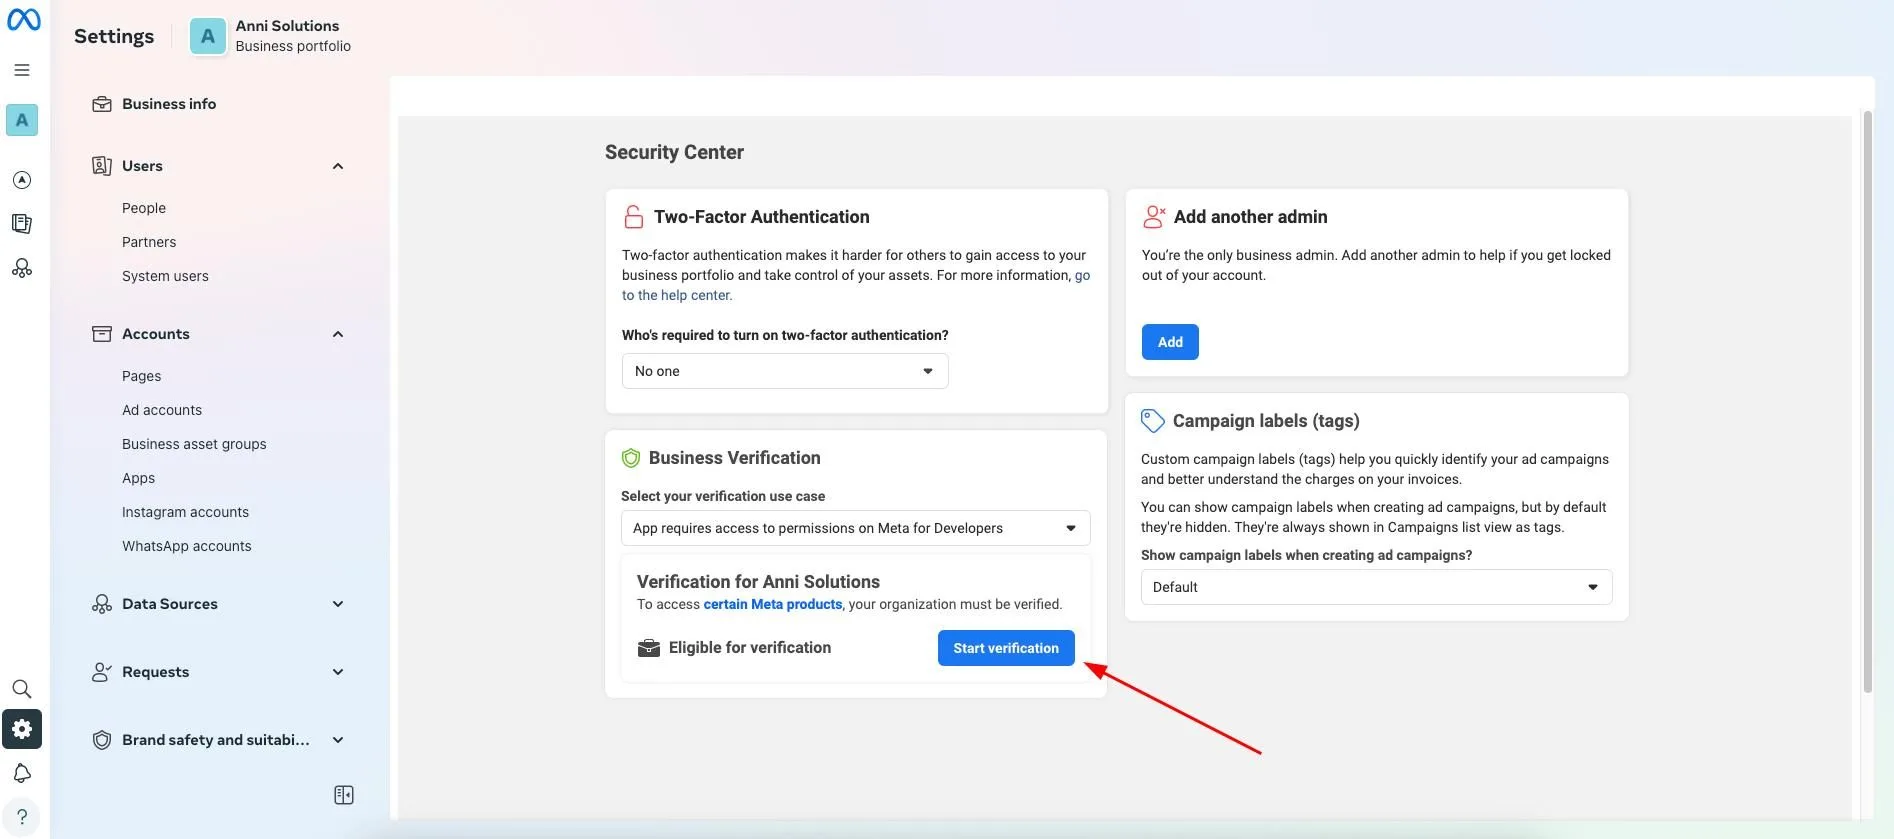
- In Security Center, find Business Verification and click Start verification.
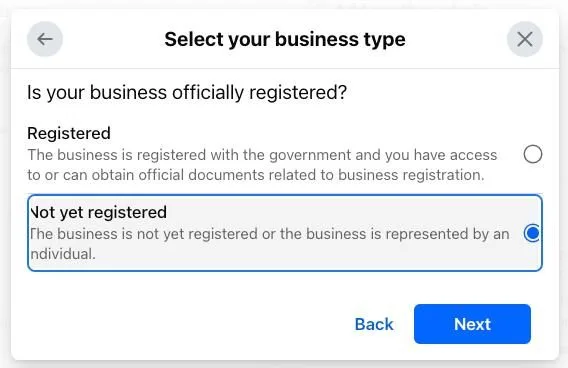
- Follow the prompts: Select your business type (e.g., Sole Proprietorship)

- Enter business registration status
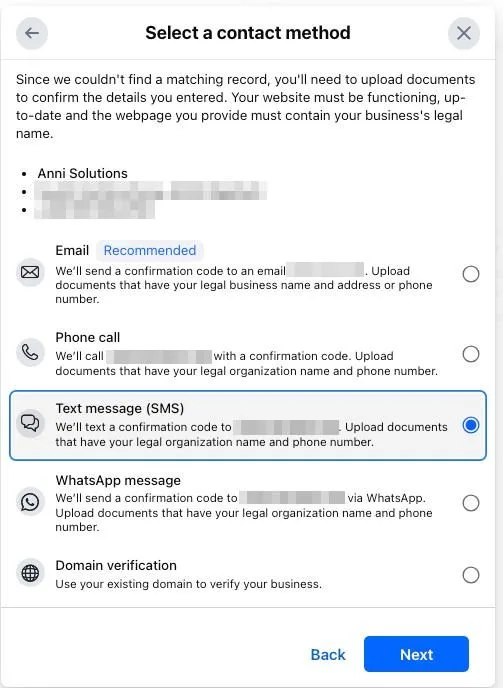
- Provide business details and documents
- Choose contact method and verify via SMS or your preferred method.
- Upon successful review, your business status will show as Verified
Meta review typically takes 1–2 business days.
4. Add WhatsApp Product #
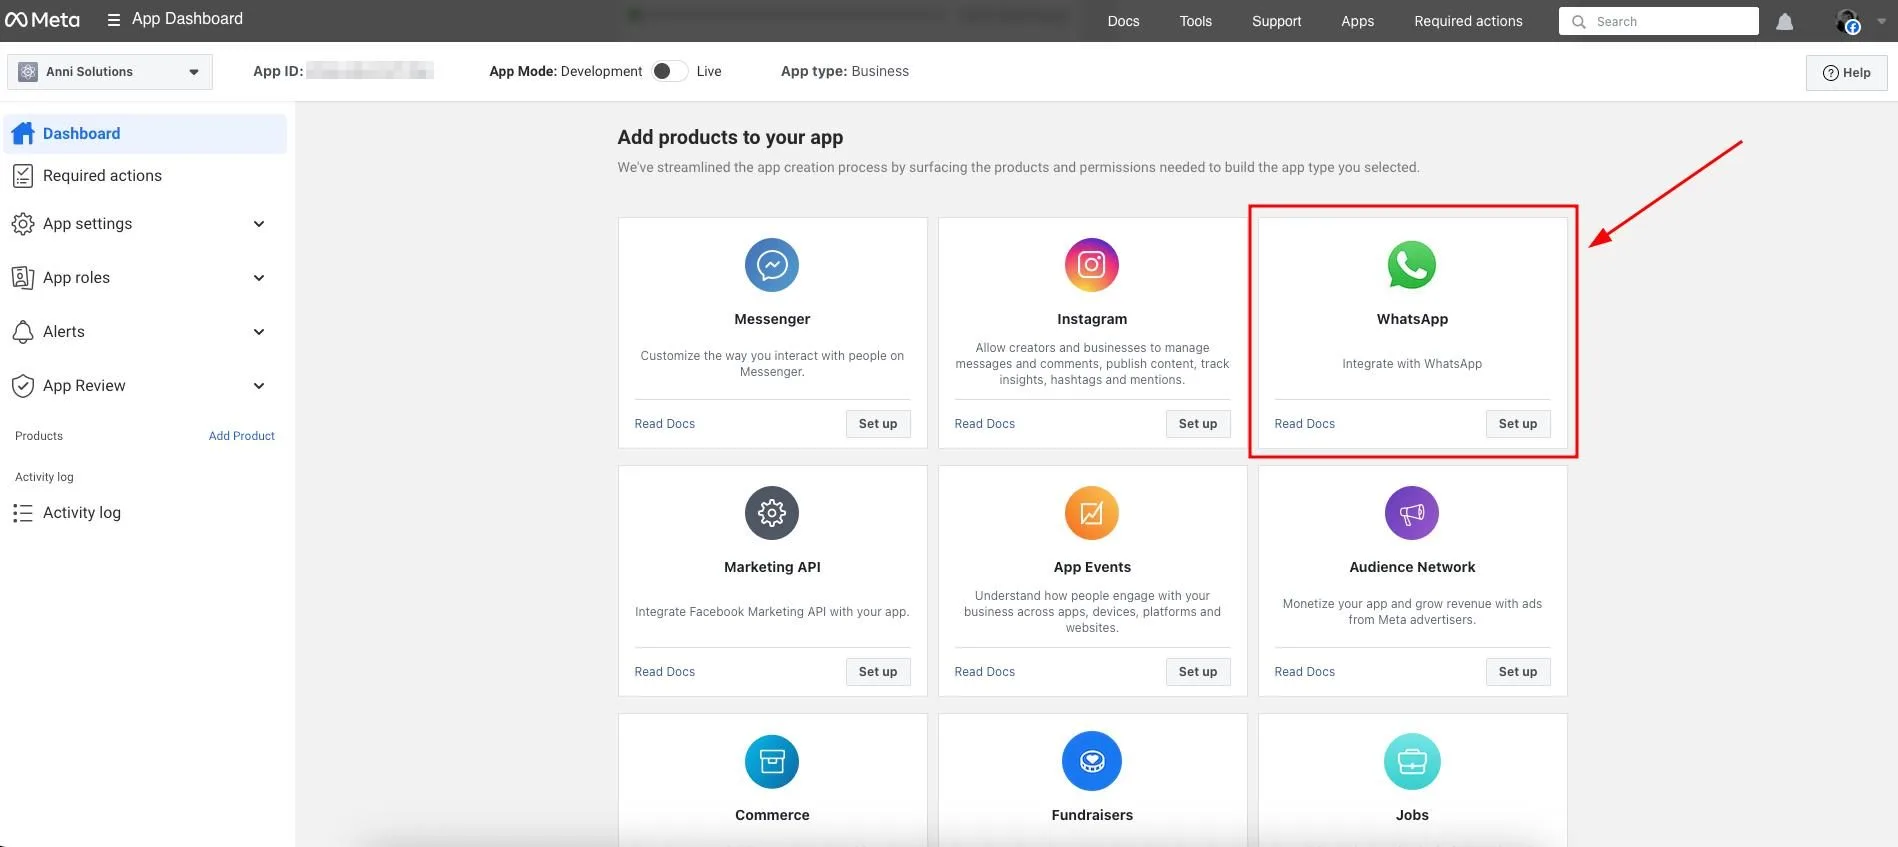
- In App Dashboard, scroll to Add products to your app and click Set up on WhatsApp.
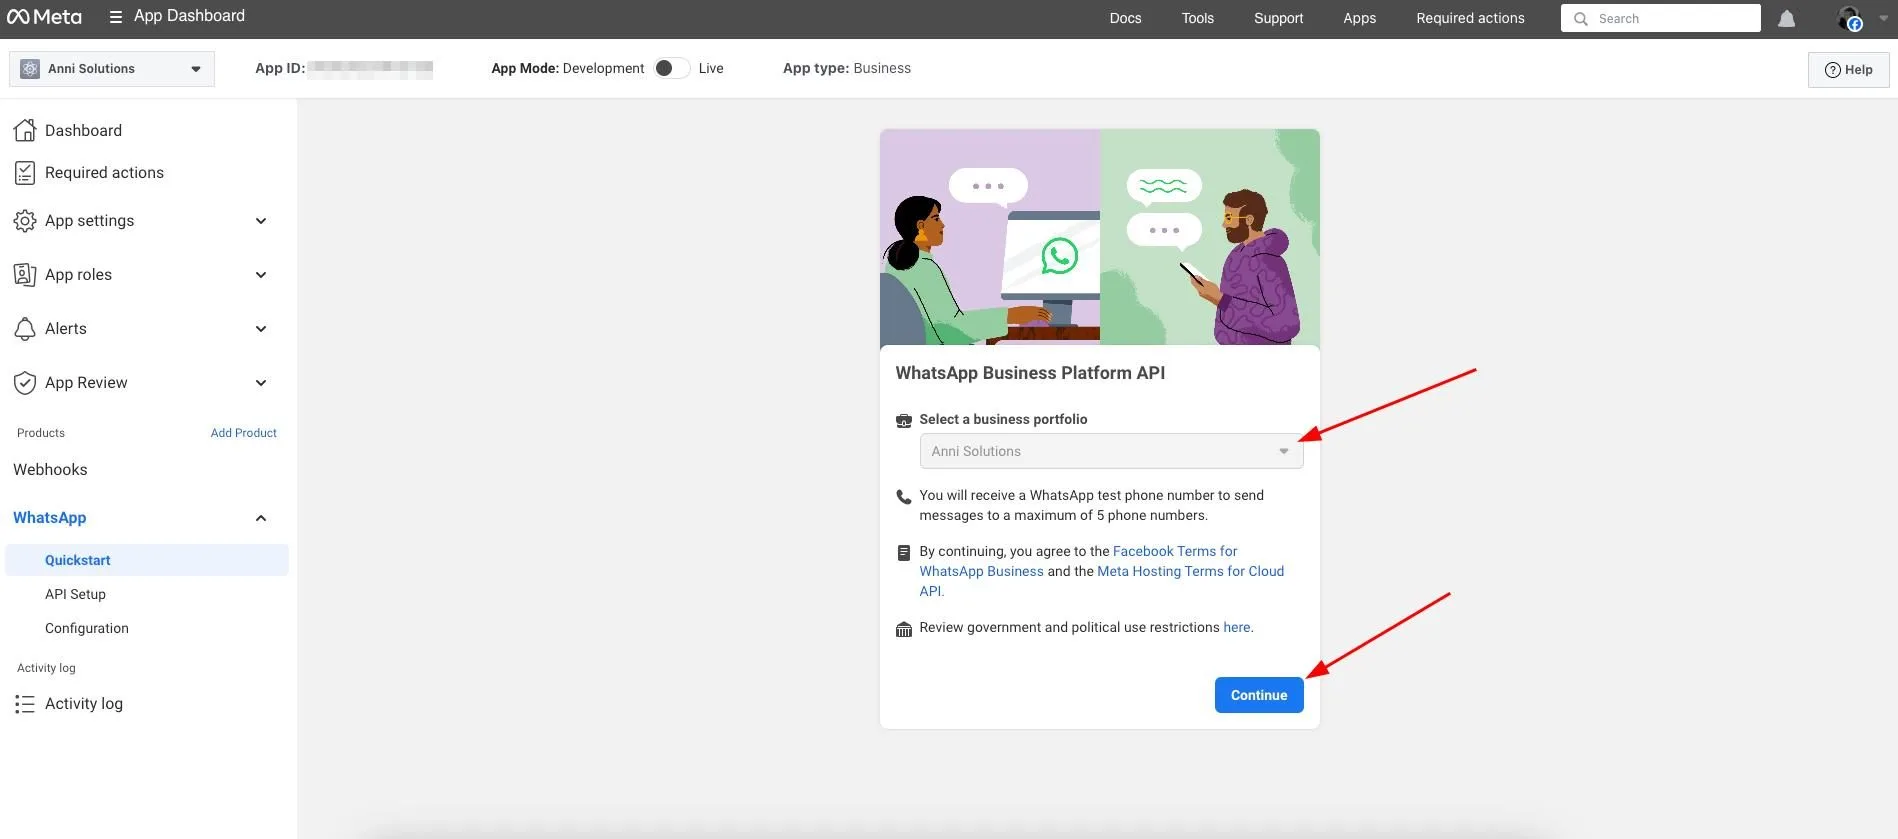
- Under WhatsApp Business Platform API, select your business portfolio and click Continue.
#
5. Set Up WhatsApp Business Profile #
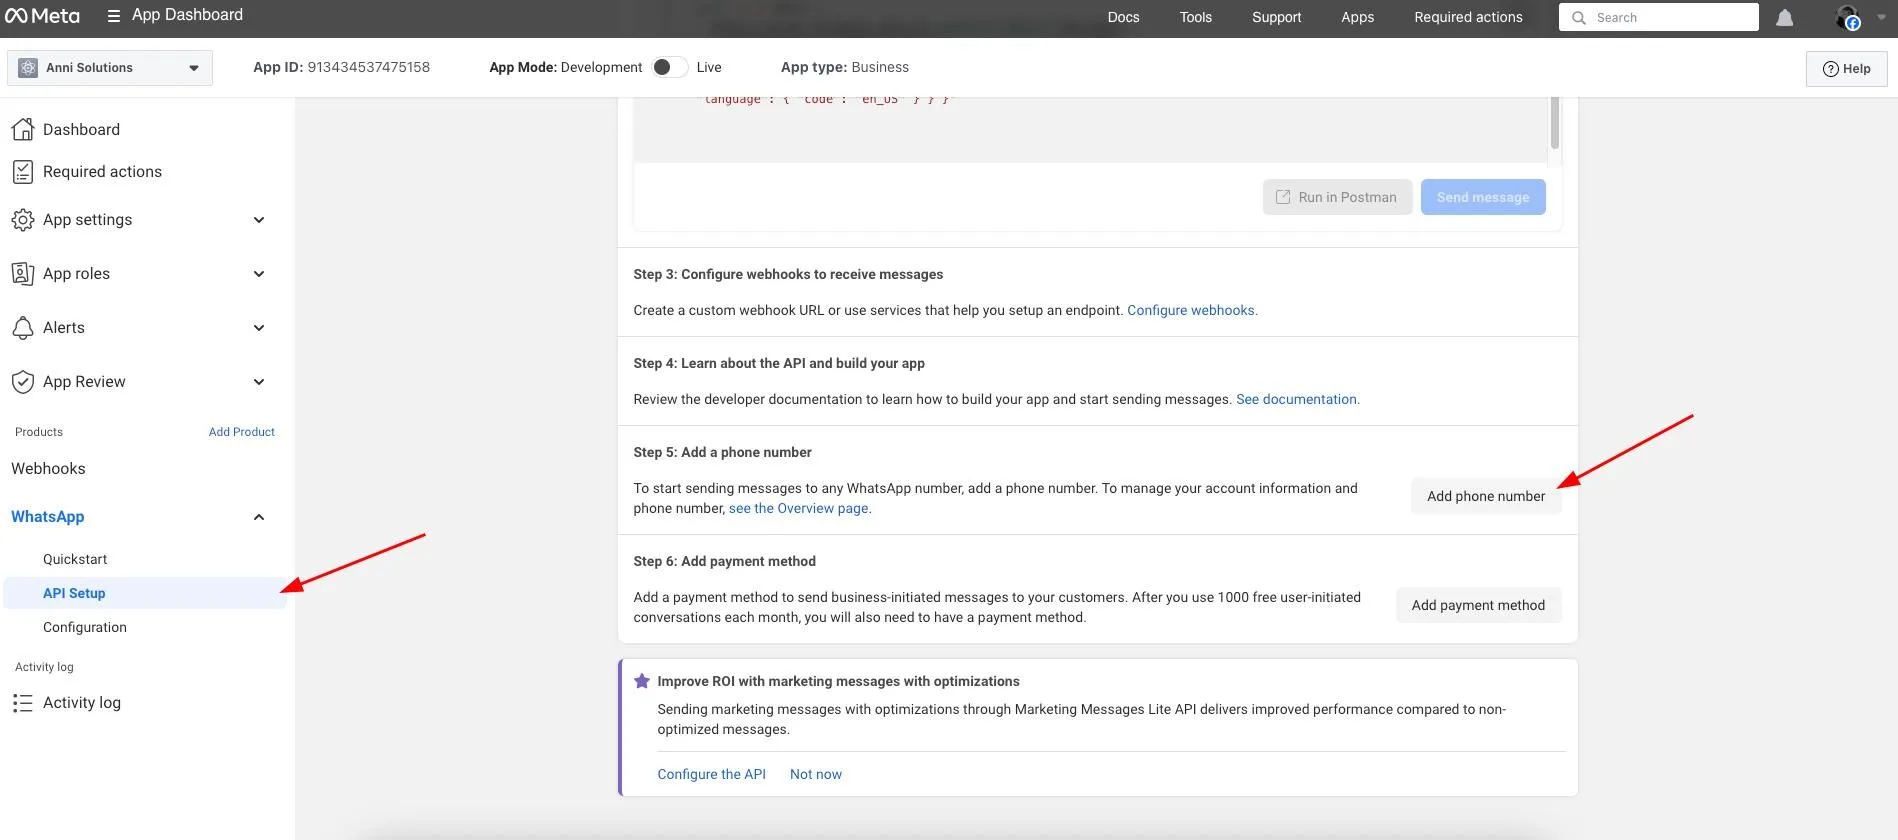
- Go to API Setup, navigate to Step 5 and click “Add phone number”
- Fill in your WhatsApp display name, Timezone, and Category then click Next
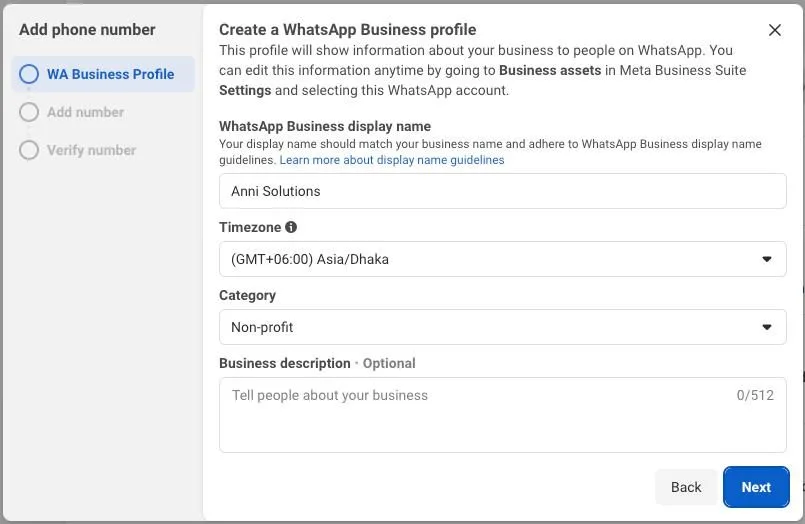
- Add and verify a phone number via SMS or call

- Confirmation shows your WhatsApp Business Account created
6. Configure API & Payment #
- In API Setup, choose or add your phone number, then click Generate access token
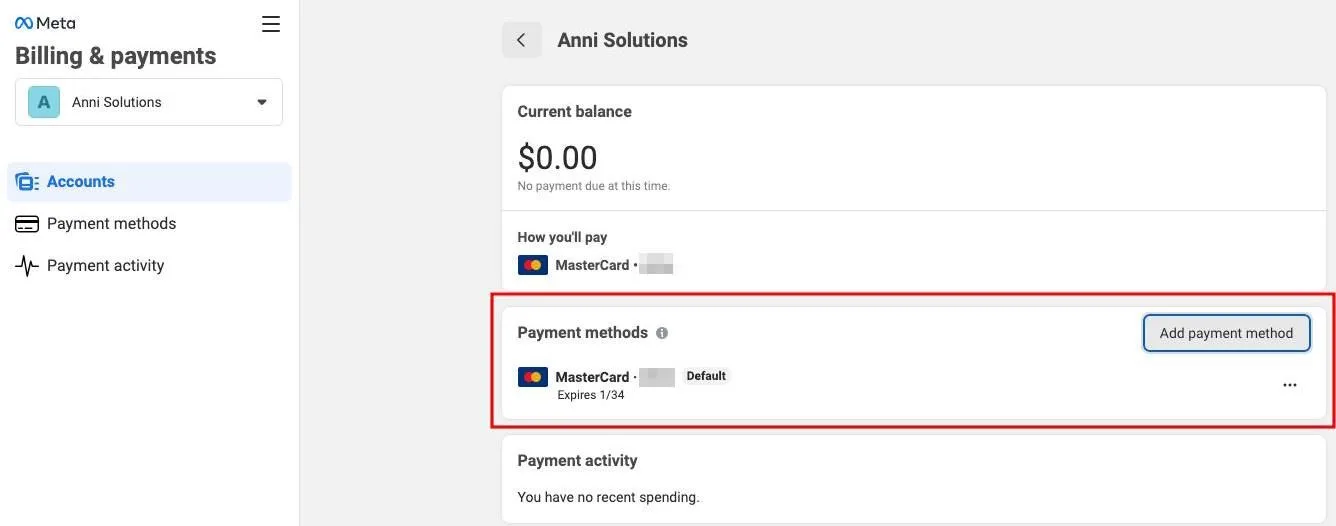
- Click Add payment method to set billing under Billing & payments in Business Settings
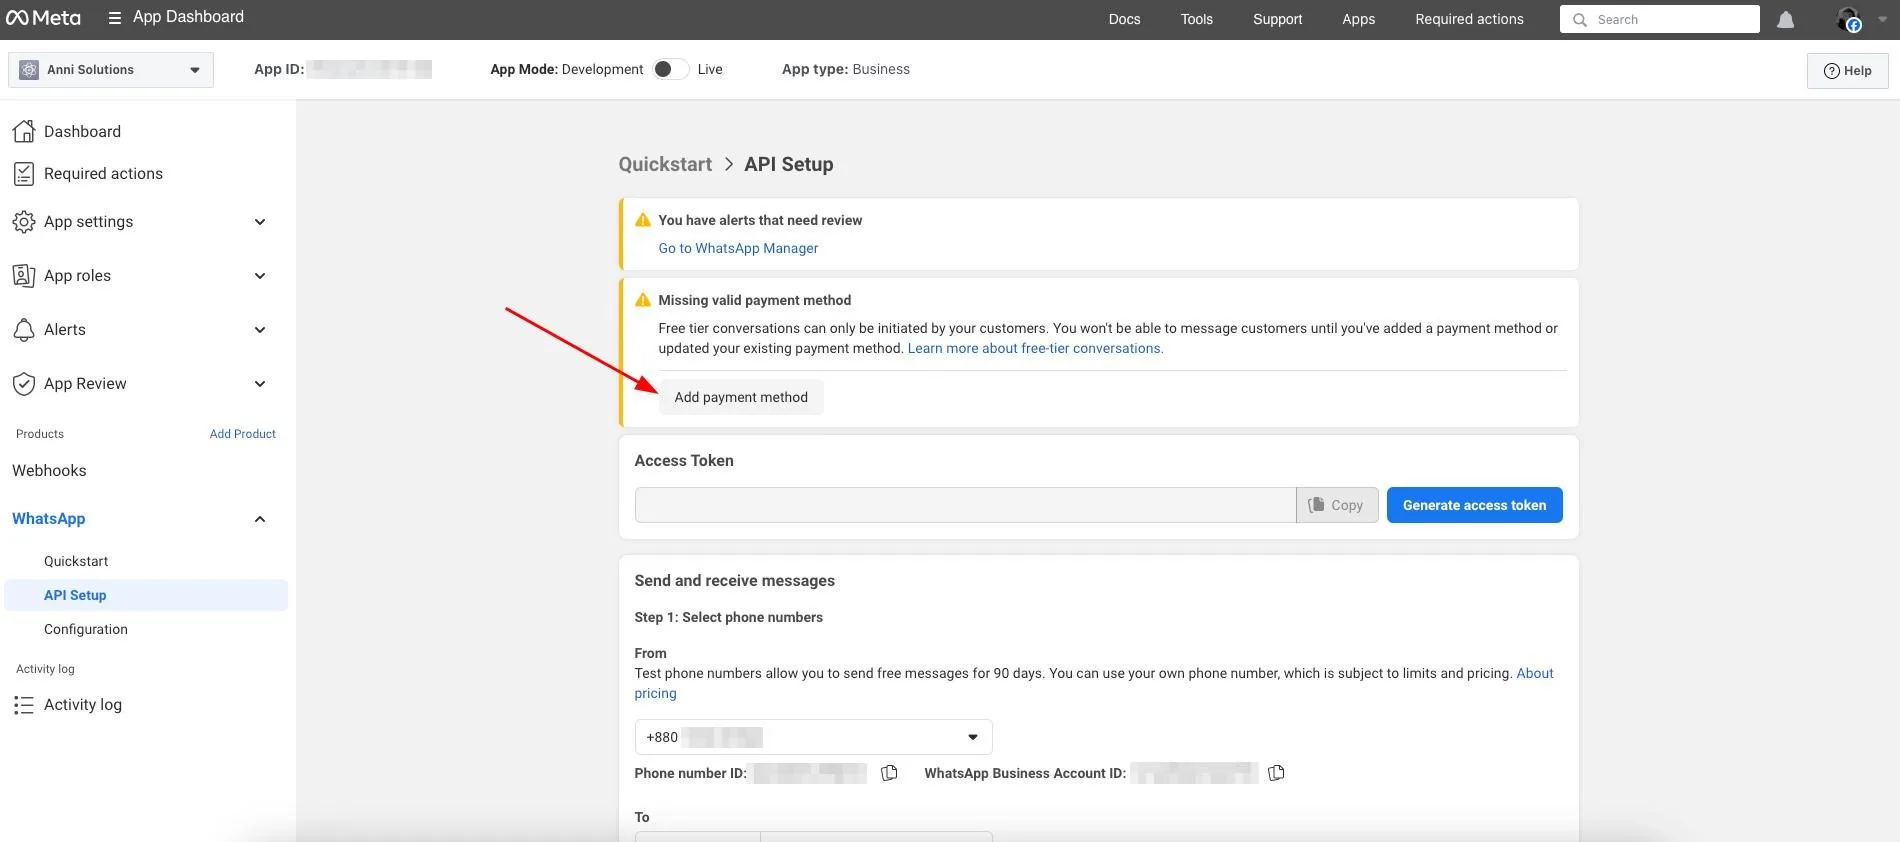
- Verify your credit card appears under Payment methods
7. Configure Webhooks (Receive Messages) #
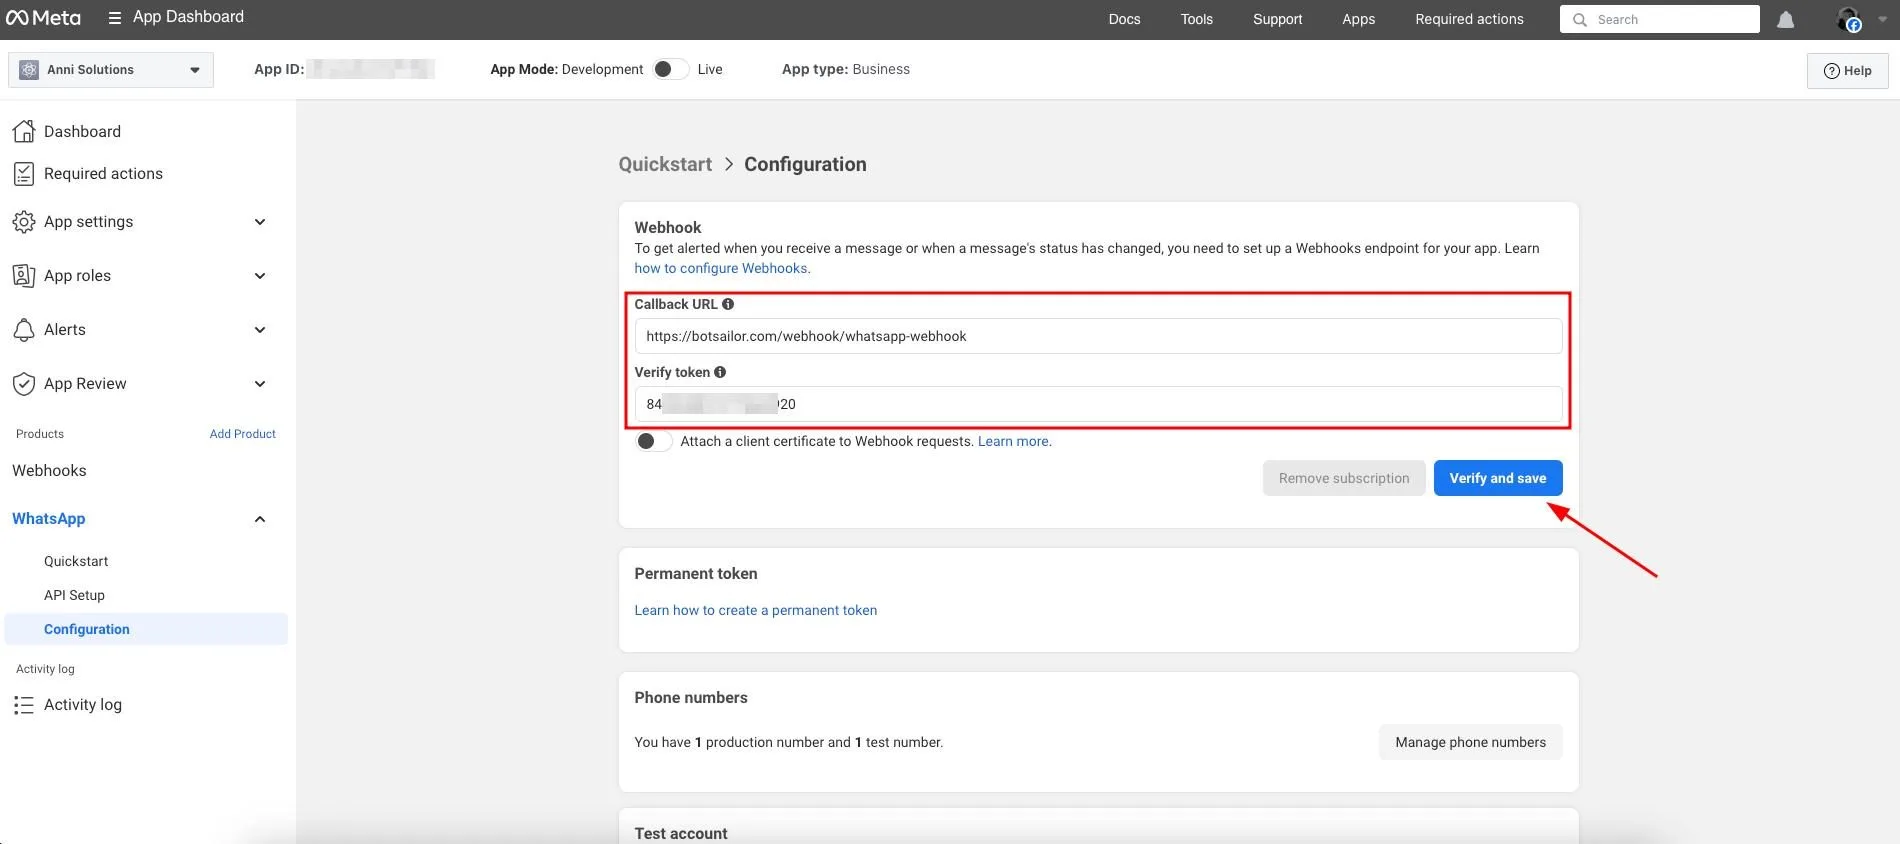
- In Developer Dashboard, go to WhatsApp > API Setup, click Configure webhooks
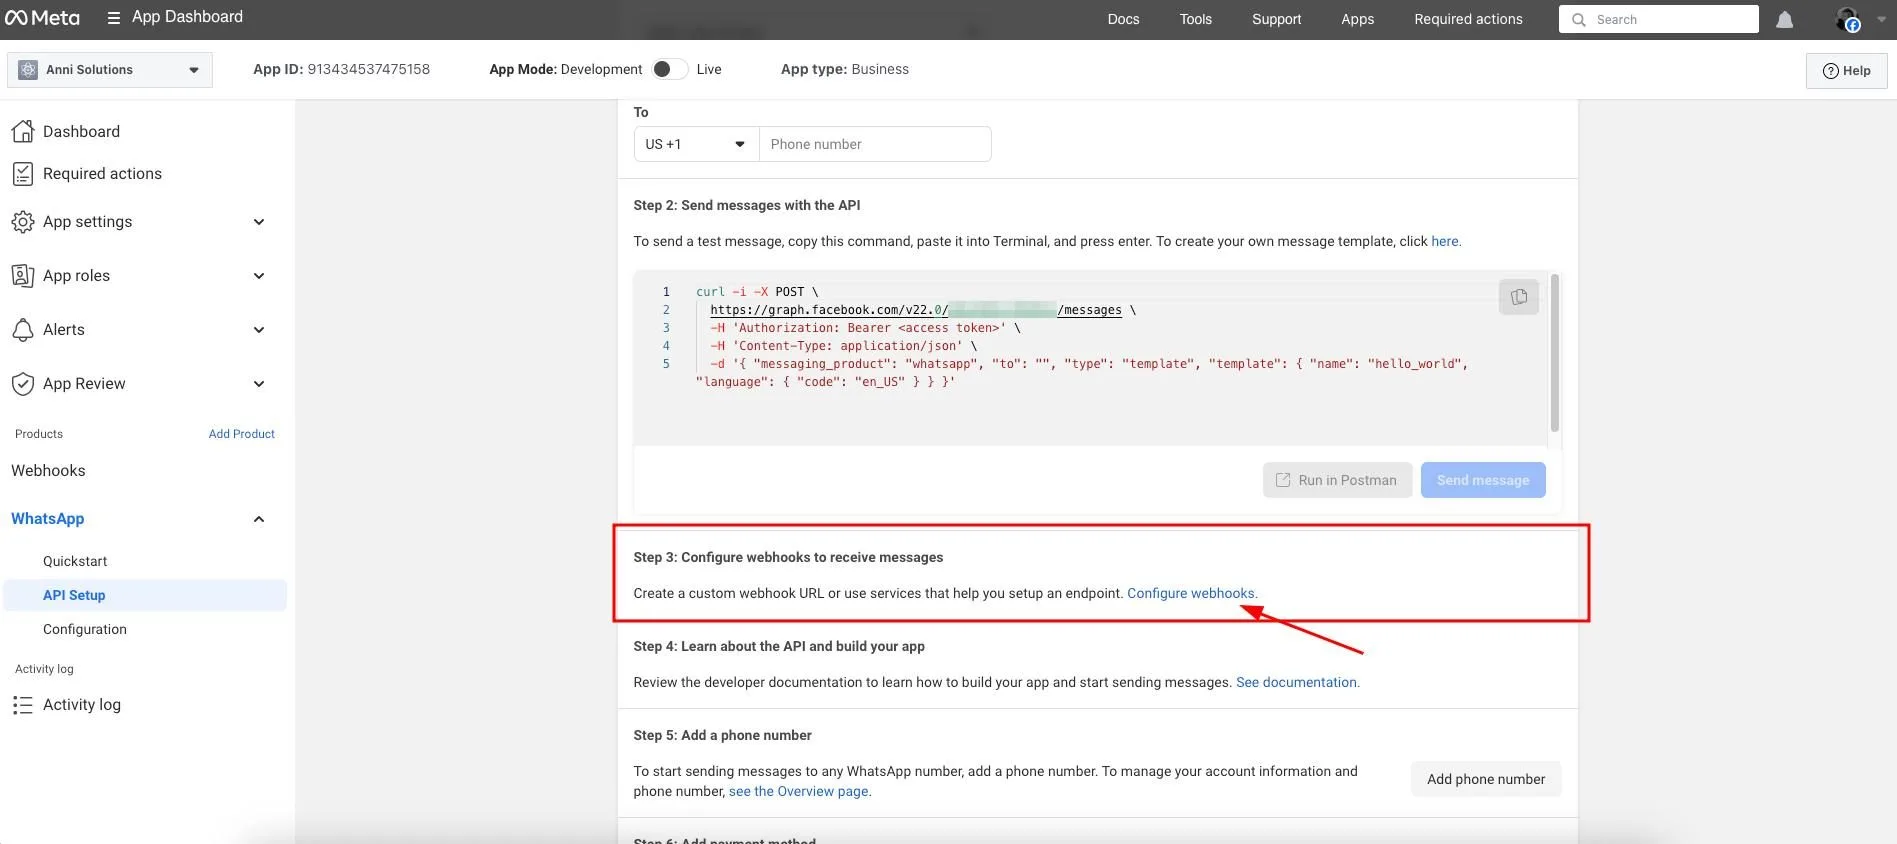
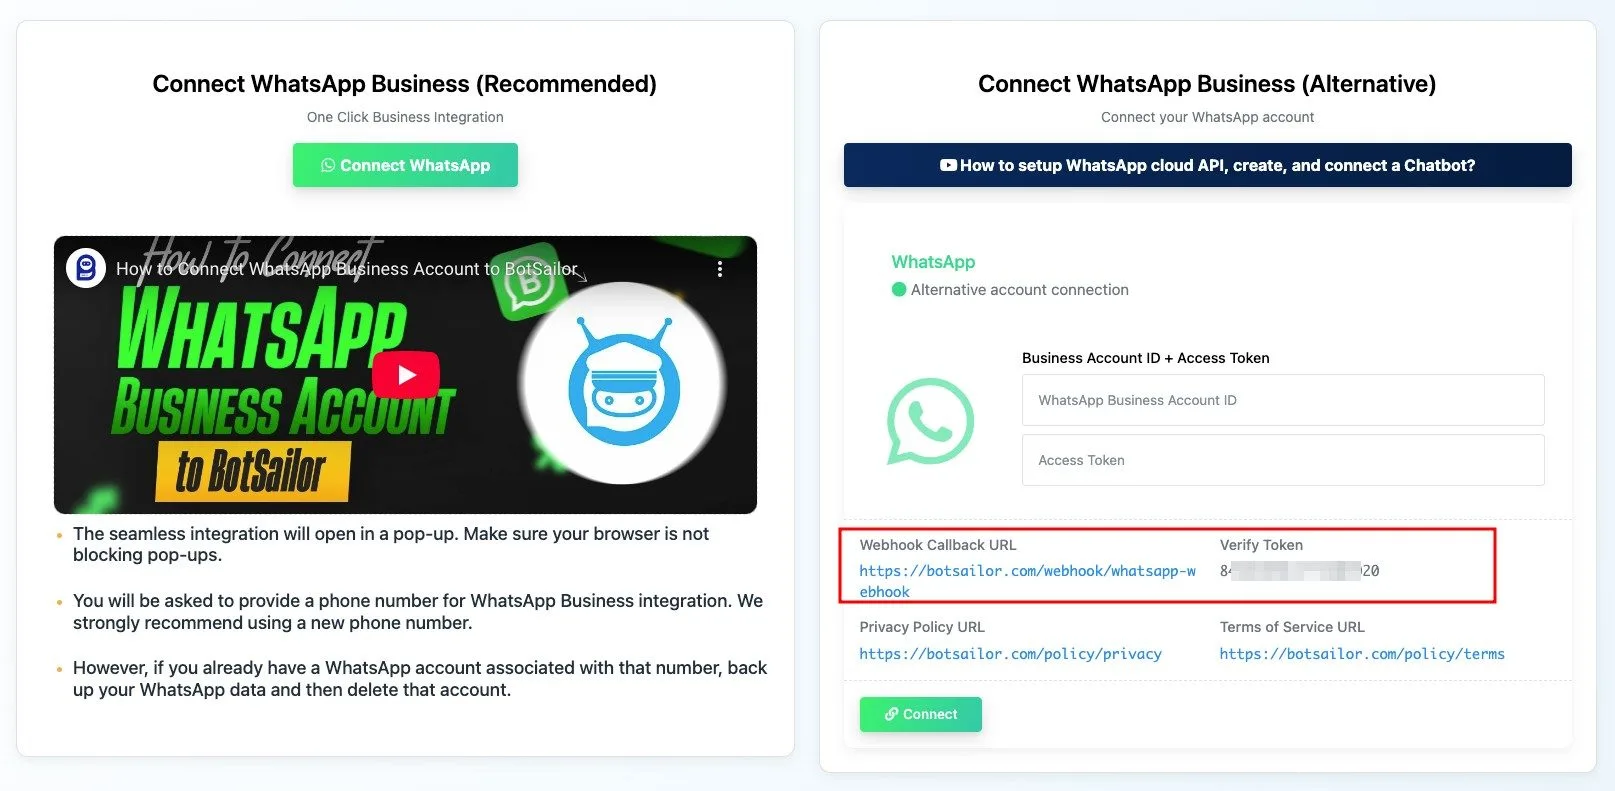
- Enter your Callback URL and Verify token from waatee, click Verify and save
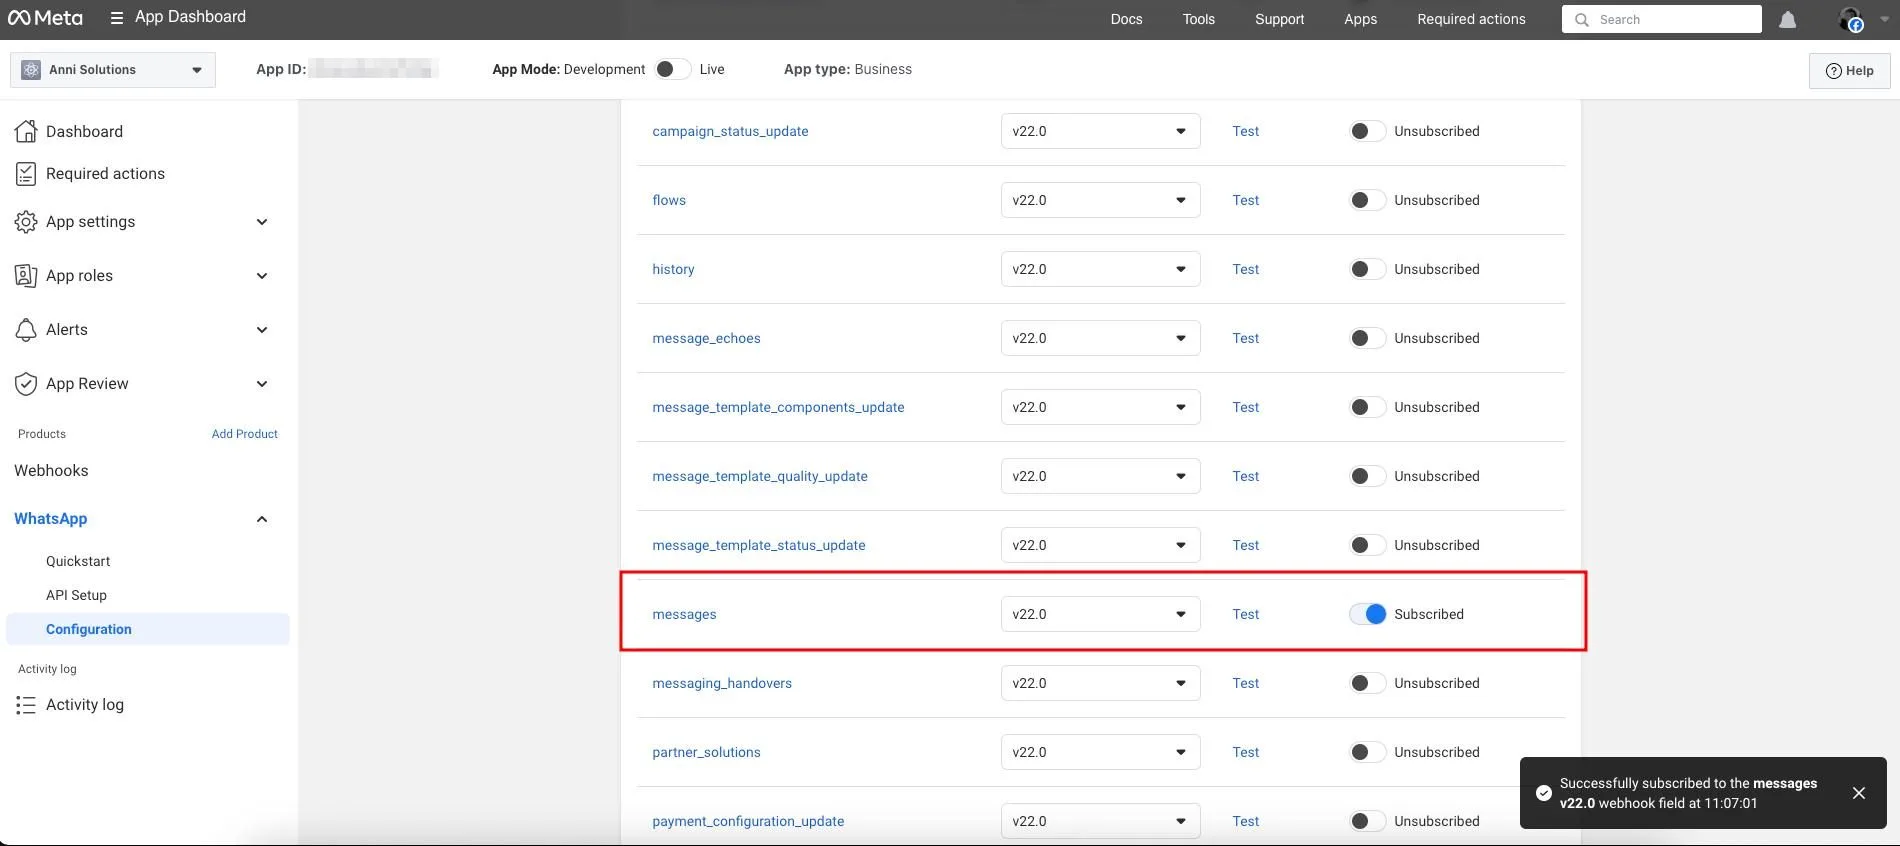
- Under Webhook fields, enable messages and test subscription
8. Publish App Live & Add Policies #
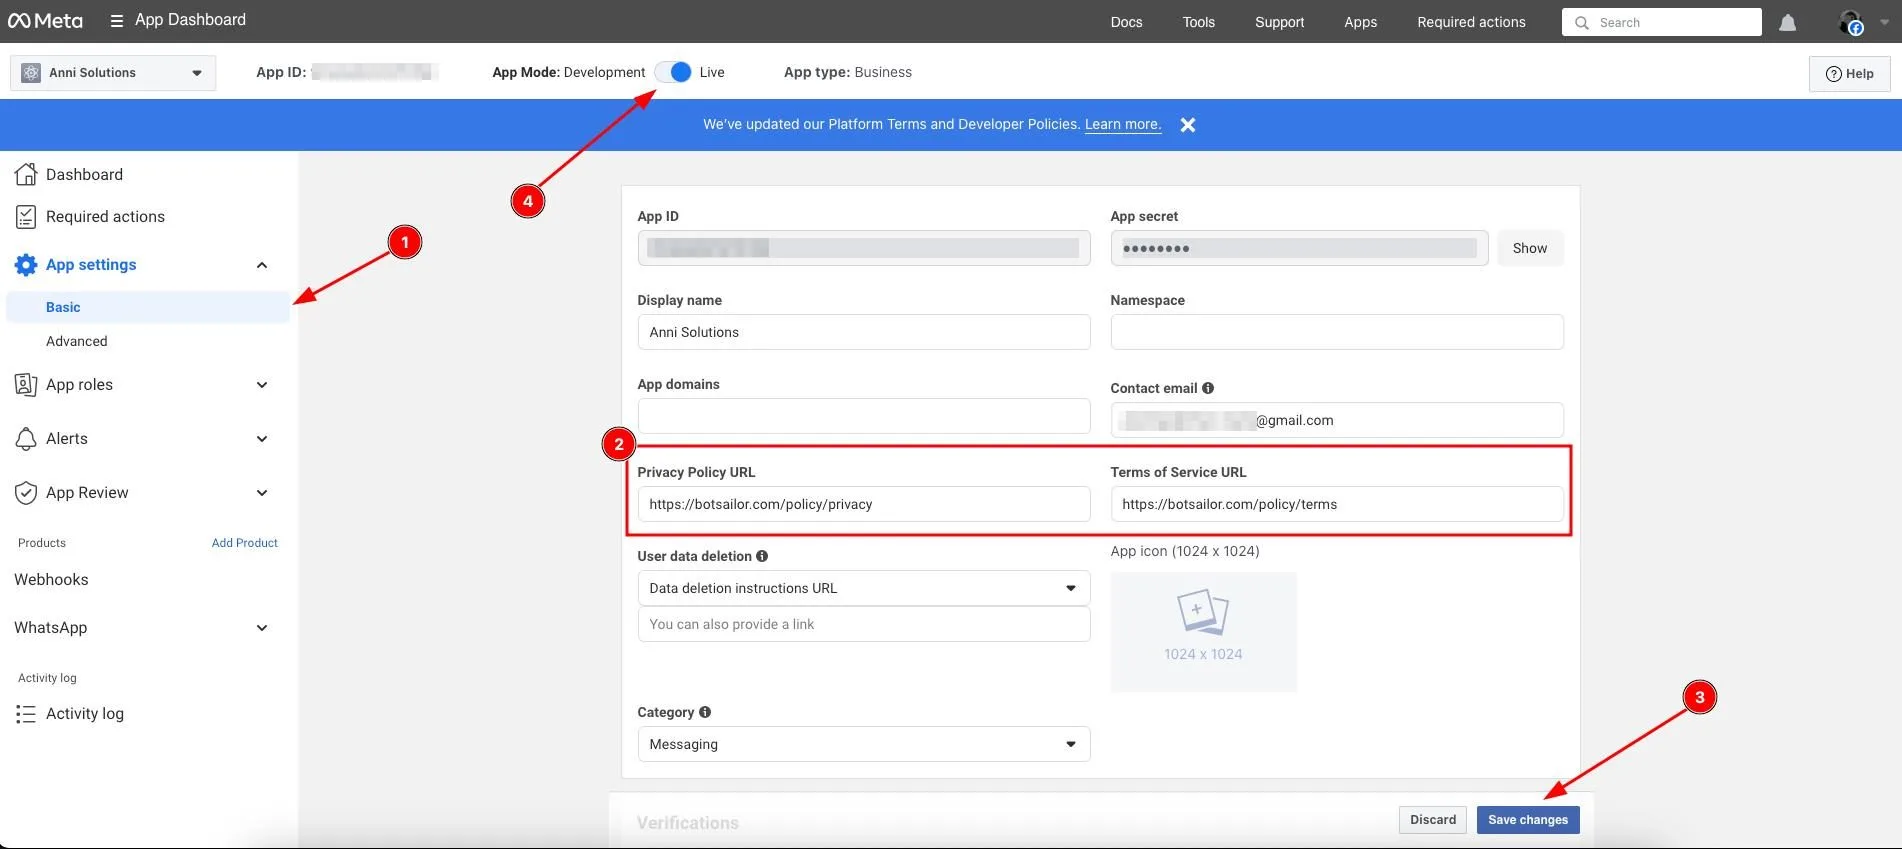
- Go to App settings > Basic, set your Privacy Policy & Terms of Service URLs, click Save changes
- Toggle App Mode to Live in App Dashboard.
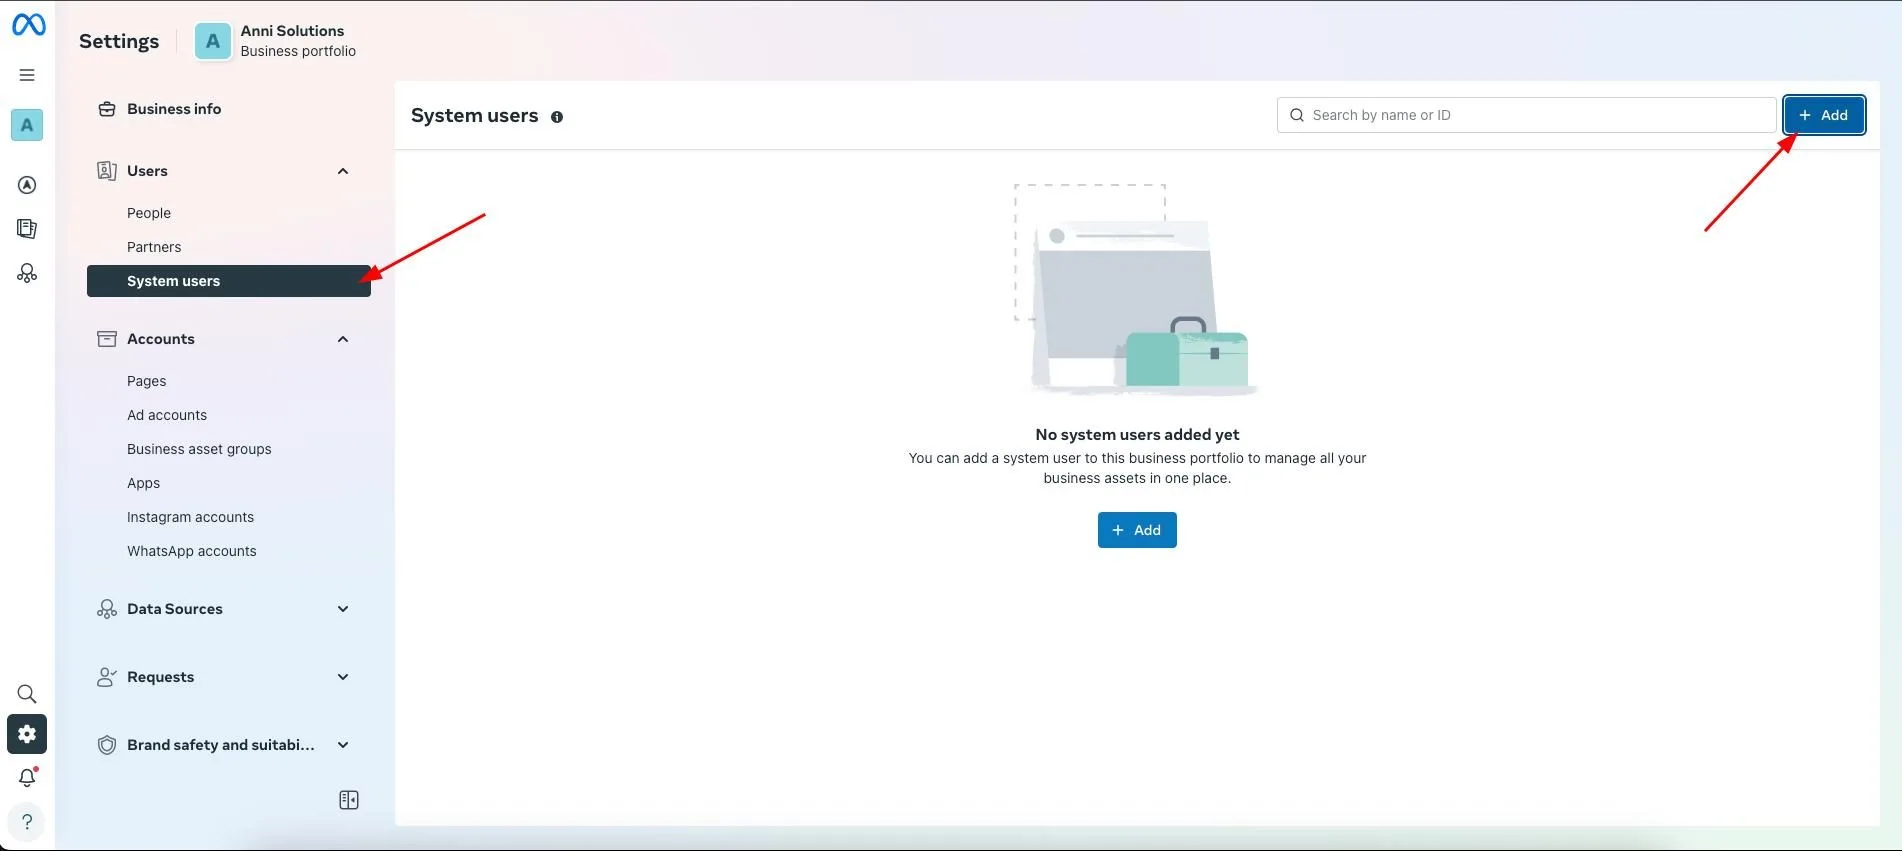
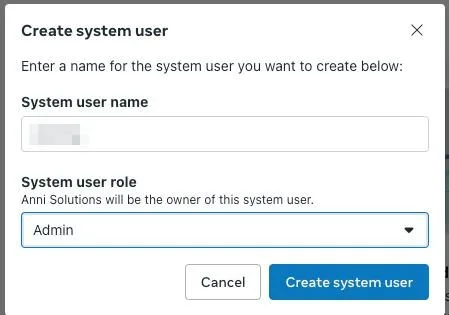
9. Create System User & Generate Token #
- In Business Settings > Users > System users, click Add and name your user (Admin role)
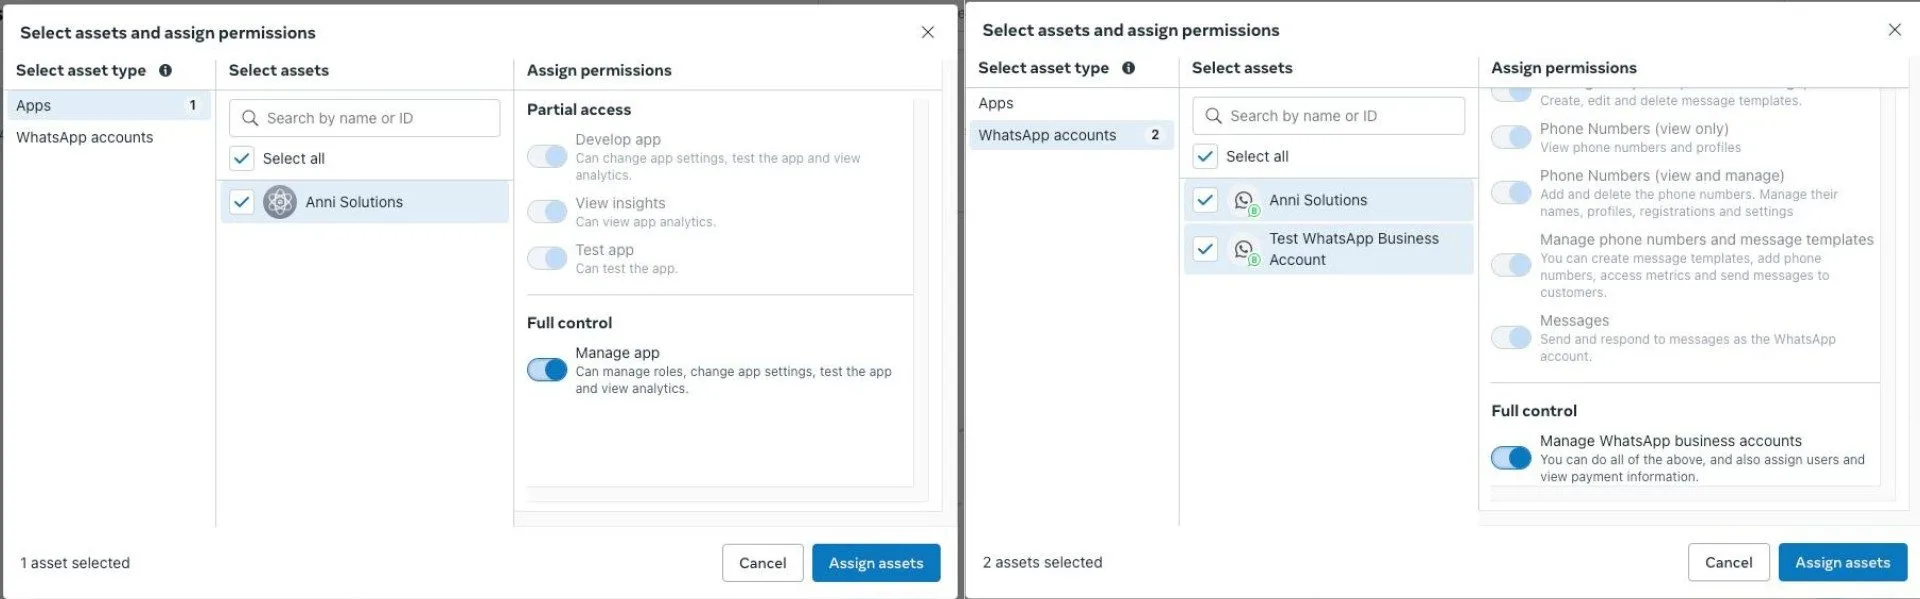
- Assign App asset with Manage app permission, then WhatsApp accounts with Manage WhatsApp business accounts
- Generate a non-expiring token: Generate token → Select App → Never expire → business_management, catalog_management, whatsapp_business_management, whatsapp_business_messaging
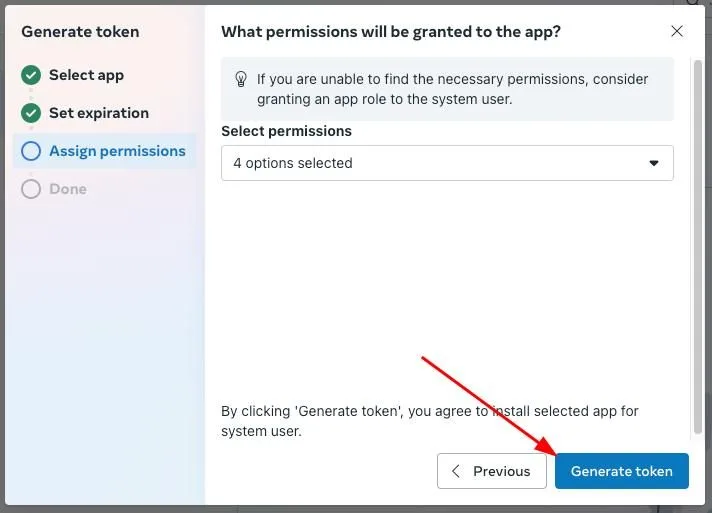
- Lastly, copy the token to a safe place.
10. Connect in waatee & Register Phone #
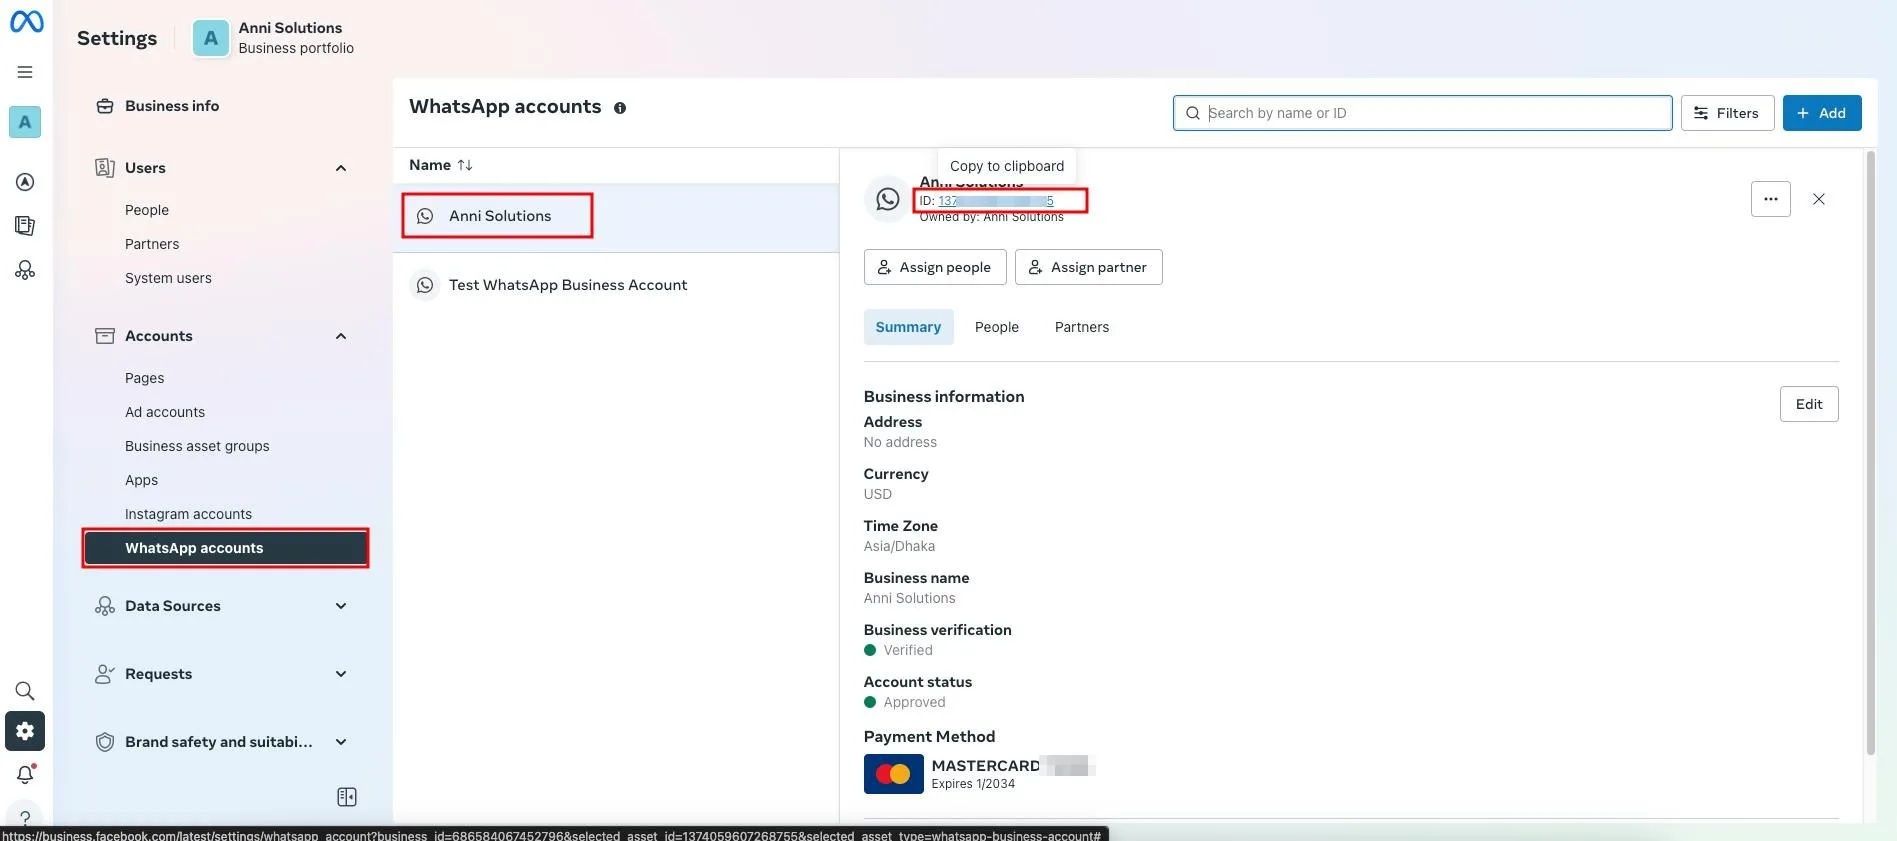
- Copy your WhatsApp Business Account ID from Business Settings
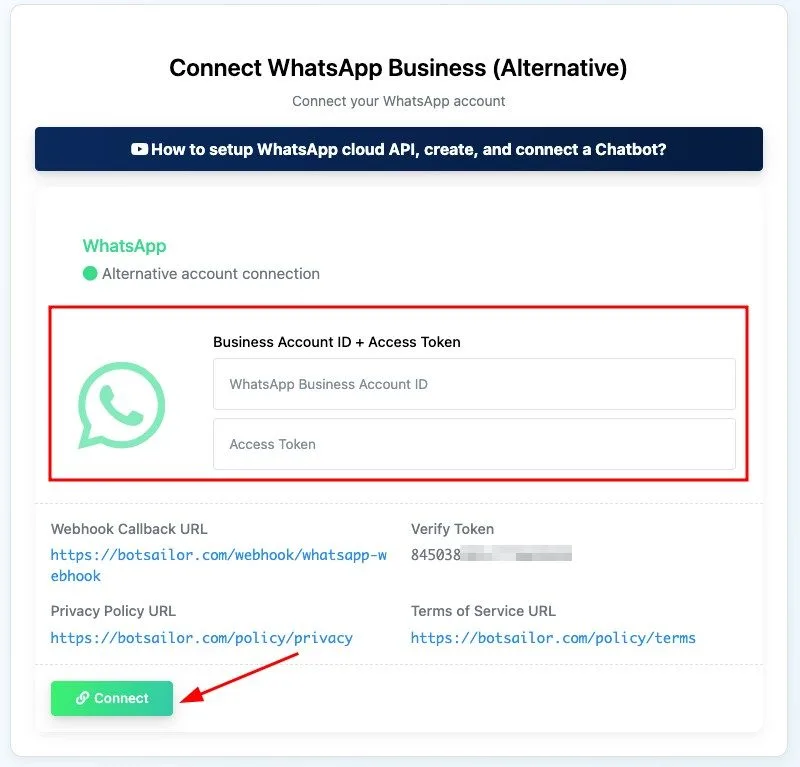
- In waatee Connect Account, paste Business Account ID and Access Token, then click Connect
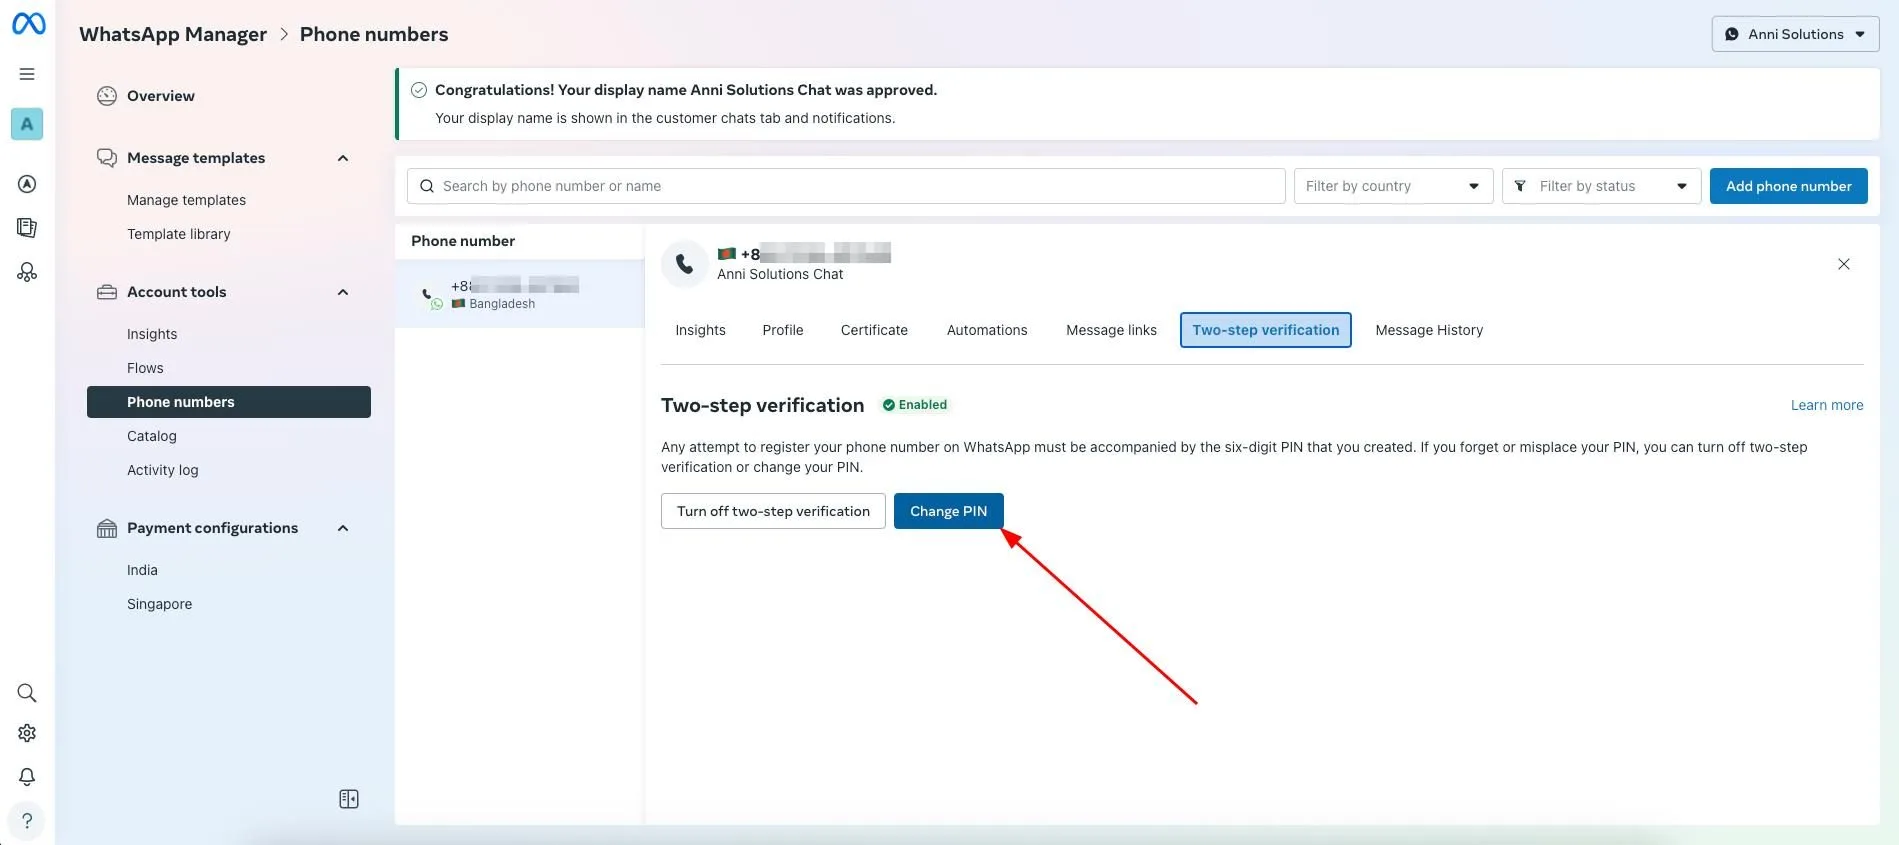
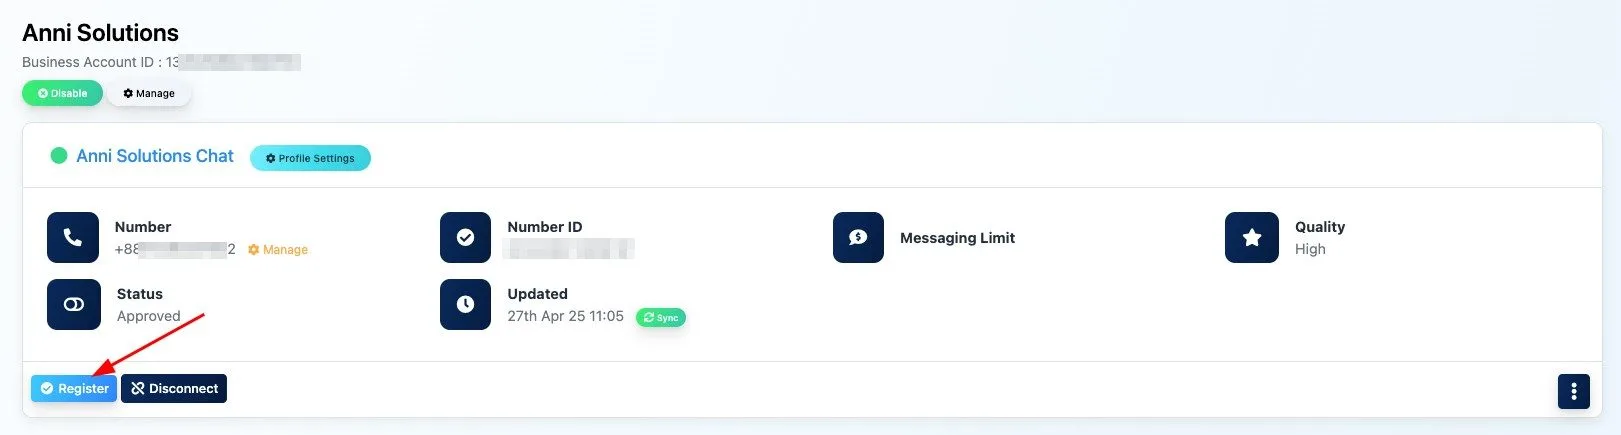
- Click Register next to your phone number in waatee, enter the default PIN (e.g., 123456), then Register
- Finally, update your Two‑step verification PIN in WhatsApp Manager > Phone numbers > Two‑step verification for added security